
2.4 Adding & Managing Languages
Prepare up to 20 translated languages, then choose plan-limited live languages at finalization.
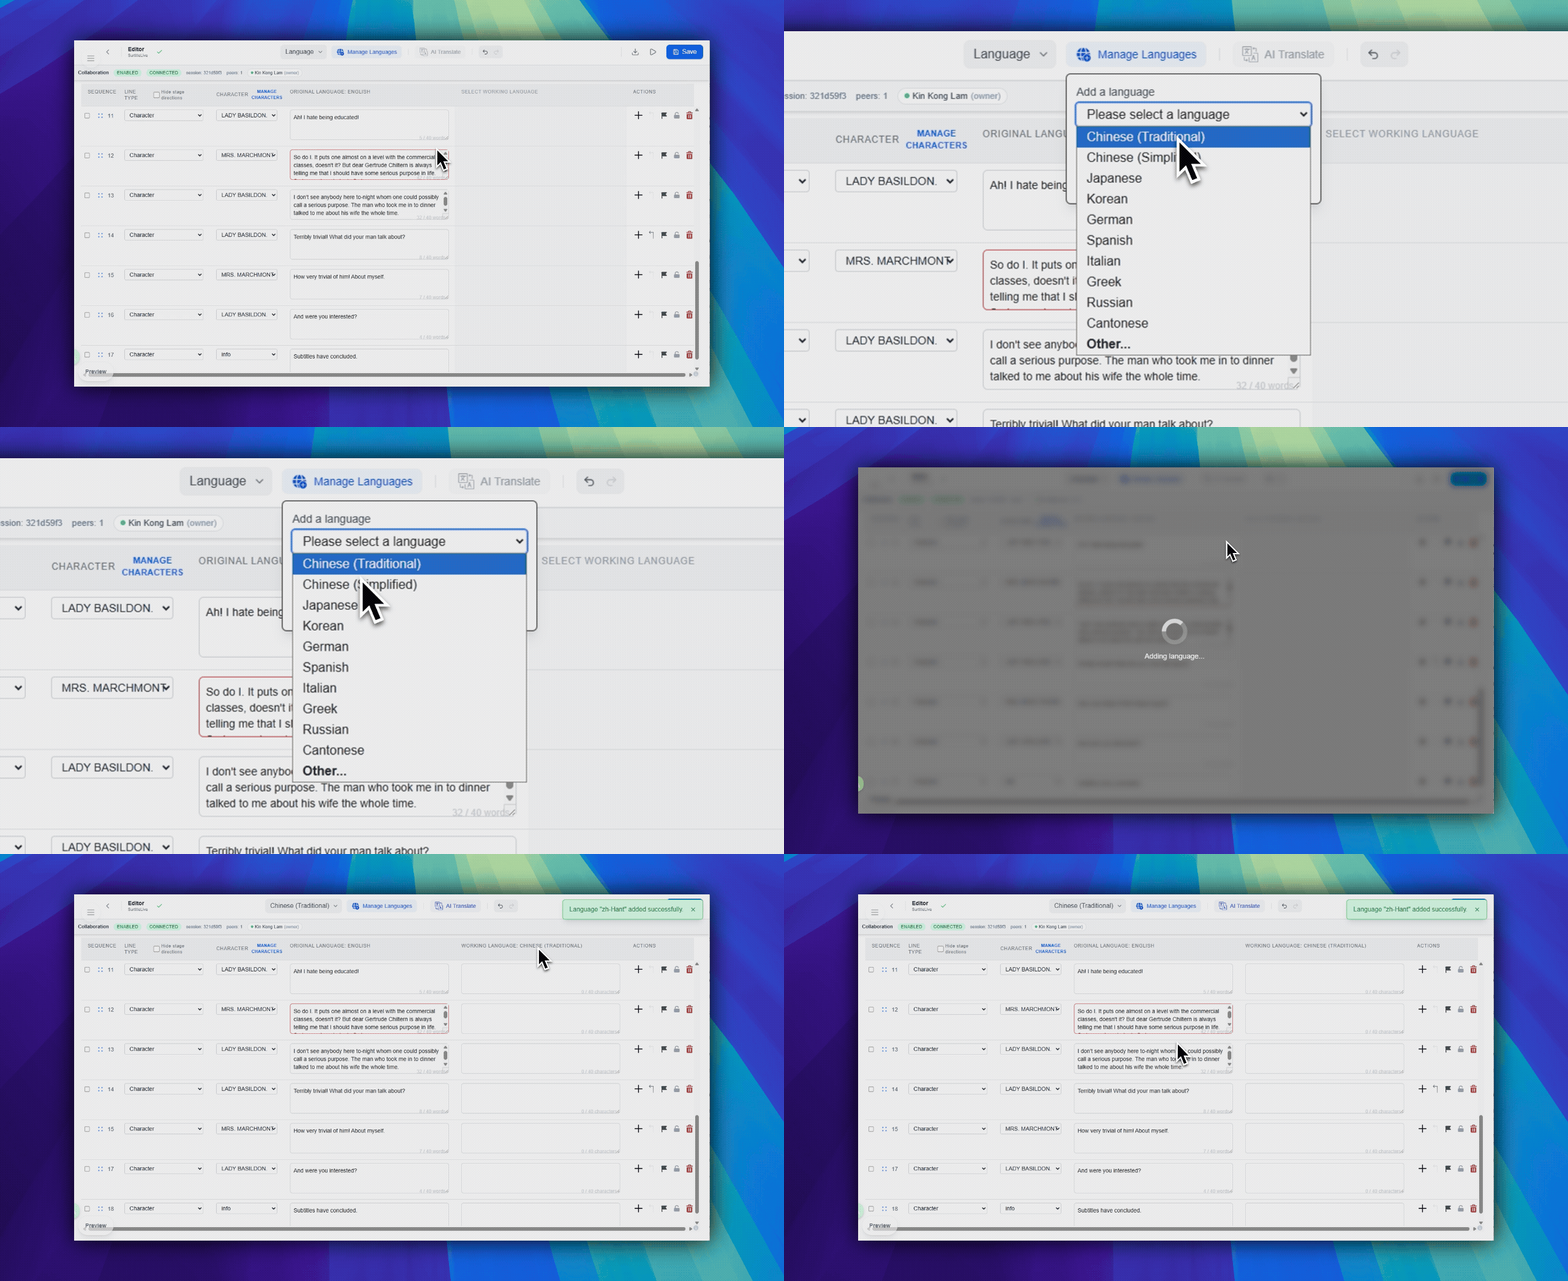
Add a language
- In the top toolbar center area, click
Manage Languages. This is the blue button with the language-management icon. - In the popover under that button, choose a preset language, or choose
Other.... - If you chose
Other..., search in the language combobox. - Click
Add.
Adding a language does not show every translation at once. It makes that language available in the project so you can pick it later in the Language selector.
Switch the working language
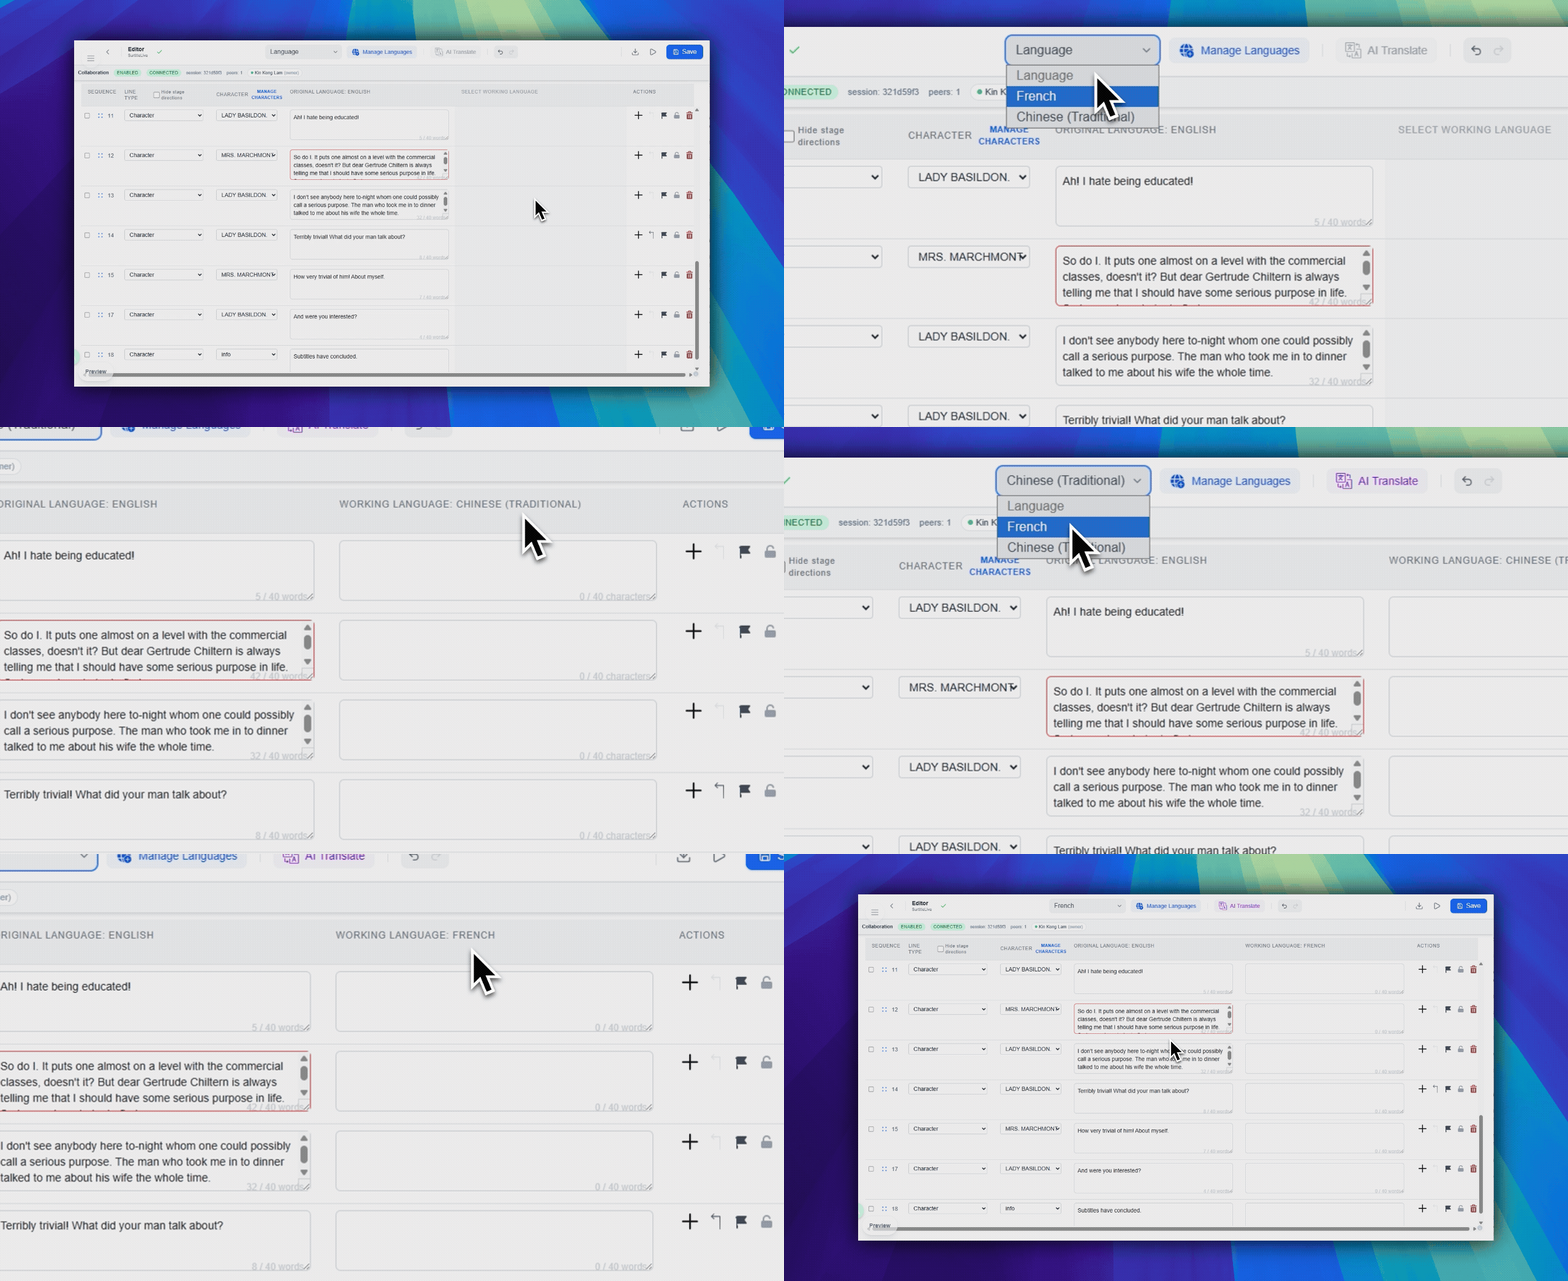
Use the Language dropdown in the top toolbar center-left area to choose which translation column the table should show and edit.
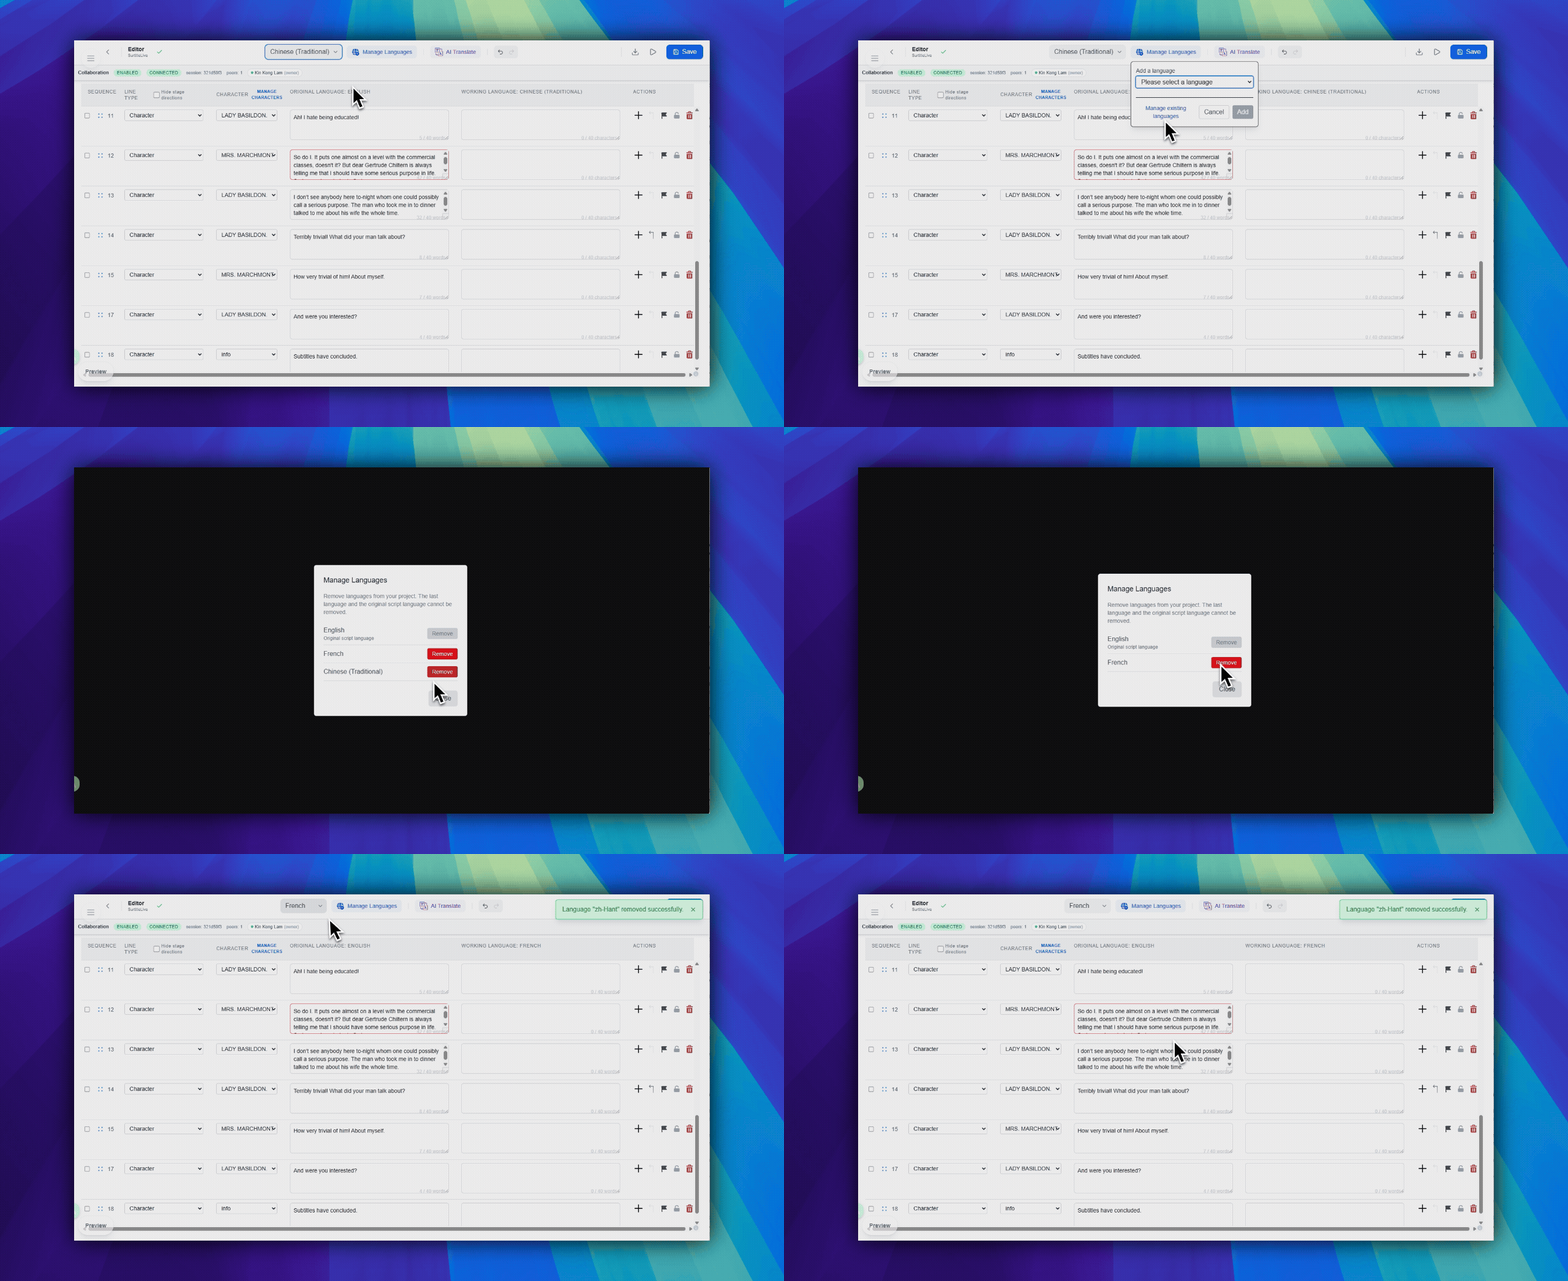
Remove a language
- Open
Manage Languages. - Click
Manage existing languages. - In the modal, click
Removebeside the language you no longer need. - Confirm the removal.
The original script language cannot be removed. The last remaining language cannot be removed either.
Editor and live-language limits
- Every tier can prepare 1 source language plus up to 20 translated languages in the Editor.
- Simulation can preview the languages prepared in the Editor.
- For live output, the source language is included in addition to the tier’s translated-language choices: Free 1, Lite 2, Pro 5, and Pro+ 10.
FAQ
Common questions for this workflow, based on the current Pockitle Cue system.
Why can't I add another language?+
The Editor accepts up to 20 translated languages in addition to the source language on every tier. Live deployment has a separate translated-language cap, also in addition to the source: Free 1, Lite 2, Pro 5, and Pro+ 10. Simulation can preview prepared languages before you choose the live set.
Can I remove a language after adding it?+
Yes. Open Manage Languages to remove languages you no longer need from the project.
Deployment Workflow
Continue In This Workflow
Script preparation, translation workflow, live deployment, operator control, and runtime troubleshooting.
2.5 Using AI Translation
Choose the editor working language, confirm the original language, and select the translation mode and method.
2.6 Writing Effective Translation Prompts
Write better AI prompt instructions for tone, rhythm, subtext, and stage intent.
2.7 Exporting Your Script
Export scripts to XLSX, PPTX, DOCX, or QLab import pack format and understand Free trial-export limits.